Tuesday, February 28, 2012

Welcome to our classroom!

A few days ago, Sasha at To The Lesson was asking me if I had any more picture of my classroom. I realised it was high time I updated my blog and today I went to take a few pics of what my preschool looks like at the moment.

This is what you first see when you pass the preschool front gate:


Here is our tiny tiny litlle hall when I welcome all my little children. You can't really see, but we have pegs all around the walls for the children to hang their coats and belongings.


This is what you see when you walk into the classroom:


On your left as you enter, you'll see our lietracy/language corner:


You wouldn't be able to see our art corner when you come in, but here it is, right behind you:


On your right (as you enter the classroom), we have our geography corner and the paractical exercise shelves:


Our jigsaw sehlving units faces the PLE corner:


Behind the jigsaw shelves, our little book corner and circle time area:


Here is another view of our book corner. See one of our sensorial shelves there too.


Our cultural/science area:


And our Maths corner:


I hope you like it!!!
As the classroom was initially built to fit in with the Montessori methhod of education, we don't have any role-play/fantasy corner. I personally believe that if I was to add such a little corner, it would benefit the children tremendously. The benefits of role play are endless but I think I will have to dedicate a full post on this topic. So until I can add an extra room to our classroom, what I do is work with boxes. I have a box for cars and small people, a box for dressing up and a box for pretend play with doctor set, tea set, teacher set etc... We don't make them available at all time but we use them to compliment or add to a theme, a story. And when it rains outside, we get the boxes out to have a bit more fun inside!!

Finally, here is our outdoor area... Keep in mind that we are just getting out of a long dull winter. Not much colour yet in the garden but that will change quickly. Just bear in mind that the trampoline is NEVER used by my preschoolers. Neither is the tree house. Too dangerous. But they have access to the rest of the garden. They even have access to our wooden decking with their tractors, their bikes and their cars. It is situated on the left hand side of the sand pit but I forgot to take a picture this afternoon!!! The children love the garden and they should be able to make the most of it as the good weater returns. I have also lots of little fun activities planned ... And I am hoping to add a few little crannie here and there to encourage oral language, role play and discoveries.  Keep in touch..


Sunday, February 26, 2012

Ladybird counting game

You all know by now how much I like to create new activities for my little ones.. Keep them interested and challenged. So I came up with this little math activity. Nothing extraordinary but I am quite pleased with it. On Friday, we were outside and one of my students came running up to me excitedly, carrying a little ladybird in her hand and shouted: "the ladybird is awake.. she 's awake... She is not hibernated anymore!!". All the kids gathered arounfd her to look at it and went all around the garden to see if they could find anymore. They were not very lucky in their hunt, alas! However, this gave me the idea for my math activity. A nice way to tie everything together! So here is what I did:

First, I made some numeral cards: I used green for odd numbers and yellow for even numbers. I used a spongy/foamy type of paper.


I laminated 10 ladybird templates I found in my "drawer of things to keep" (which basically mean, "my messy drawer where I put everything when I don't know wherelse to put them!!") and cut them out once they were laninated.


I used 55 black buttons as counters and voila!!


First the child takes the ladybird out of the tray and is shown how to lay hem horizontally, one fater one, from let to right at the top of the mat (by the way, we did the exercise at the table first, but I would strongly recomend to do it on the floor as it takes a LOT of space!).


The child then lays the number cards randomly on the mat and must pick the numbers in sequence from 1-10, laying number 1 on top of the first ladybird, on the left. The child keeps going in this fashion until all the number cards have been placed orderly. The teacher should encourage the child to learn his odinal numbers at that stage, by saying for insatnce: "what comes after 2?". The child says 3 and the teacher asks him to place it on the "third " ladybird etc.. This is a great way to either introduce or reinforce the child's knowledgeof ordinal numbers.


       Then, the teacher places the basket in front of the child and asks him how many counters the 1st card should get. The chld says 1 and places 1 counter on the left wing of the ladybird. She then asks the child how many counters should go on the 2nd ladybird. The child places 2 counters: on on the left wing, and another on the right wing.

       When the exercise is finihed, I would remind the child of what an odd and an even number is and point at the pattern of the counters. The odd number have no partner at the end of the row but the even number numbers do. I would also point at the different colours used for this exercise.

      I am very pleased with the activity. It is base don the cards and counters material designed by Montessori but with a little twist, which I think will attract the children and bring them back to the task again and again.... As i said above, nothing you haven't seen.. nothing extraordinary.. but it is so satisfying to create your own materials!!!!!!

Sunday, February 12, 2012

Caution: Floor mats in use here!!!

Here is what went on this week in our classroom. A bit of this and a bit of that....

Remember my recent post in our literacy activities? Well, here are a  few pictures of the children in action with the sound booklets, the sandpaper letters and objects and the sandpaper letters witht pictures:


I found these exercises so beneficial to the children. We always revise our sounds at circle time and introduce new ones too. Of course, this go hand in hand with the sandpaper letters during individual lessons. However, I have found that, taken out of these 2 contexts, if some children are asked to recognise a sound, they are lost. Practising their sounds this way was so enticing and they really liked it. It helped a few of them to make the association between a word, its initial sound and the written sound. I am really glad I spent so much time making the booklets and looking for objects around my house for our box (believe me, it was probably the hardest part.. though my own kids thought it was fun... LIke a scavenger hunt inside the house!)

What else did we do?


Punching and gluing


Tracing, colouring and cutting exercise


Jigsaws


More jigsaws


The above photo shows how the children are using our floor mats in the classroom. To be honest, over the past 2 weeks, I have been reminding the children of the importance of working with their mats (either on the floor or at the table). This was a principle of the Montessori method we had gone over at the beginning of the year but some children had either completely forgotten the rules and forgot to use the mats altogether or they were not using them appropriately (e.g:  carrying their work and mat separately). So, I reintroduced the lesson on the use of mats in our classroom. The mats provide children with a delineated work space of their own where they can work. I explained again to the children that a mat represents their own space of work. Nobody can interfere with their work on the mat, touch it or alter it. Children have to learn and show respect for their peers’ work. Basically, the purpose of the mats is to reinforce Montessori's principle of "freedom within limits". I showed them how to walk around the mats and how to place their work on the mats. They were reminded that (as I said above), they are not allowed to join a classmates’ work unless they have be given permission by that child. The children have been more careful thanks to these reminders and you know what… their work and concentration have already improved so much.. Why didn’t I do this before?

Thursday, February 9, 2012

Will you be my Valentine?

Yes, it's Valentine's. And I have been so un-organised!! I haven't been able to get motivated and to ne honest, when I went looking for little hearts and items like this for our Practical Life exercises, I simply couldn't find anything!! What a shame.. If I had given myself enought time, I probably would have found enough gadgets.... Never mind!! I'll make it up for Patrick's Day!!!
However, the children have been working on a little Valentine offering for their mam or Dad (or both).. I basically reproduced the activity we did last year (you can see right here).

Instead of using chick peas, I decided to use some wooden coloured beads. The children couldn't use them for lacing activites as they were badly shaped. So they were there, in the cupboard and I thought it would be a nice way to recycle them.


Now, the plan is for us to paint them in red. I couldn't make up my mind so I let the children decide. So here are the 2 final versions of the craft.


If you don't have any wooden beads or chick peas, why not using coffee beans? We ran out of beads and my assistant Rachel came up with this rescue solution!! Not bad, hey? (sorry I don't have a photo of the painted version!)


Wednesday, February 8, 2012

Unispiring geometric solids? Not anymore!!

I must admit that our Geometric Solids have been rarely used in our classroom, probably because it didn't inspire the children.  The children have been introduced to the names of each solids but this is not a popular activity. I had been thinking about extending the exercise but never gor around it until I finally got onto   Montessori for Everyone and downloaded a set of matching cards to be used in conjunction with the geometric solids.  The set of cards depicts each of the Geometric Solids with several corresponding photos for each shape. The photos represent objects in the child’s environment/community. I made a set of 10 labelled geometric solid cards to be placed under each solid and a set of 30 picture cards for sorting. I placed them all in a basket, right beside the geometric solids on our sensorial shelves. The child will be asked to first match the geometric solid cards to the solids. Then, he picks the set of picture cards and places each one of them under their corresponding solid.

Picture borrows from Montessori Albums


The first thing I do is to bring a child to the sensorial shelves and tell him/her that I am going to show him/her how to work with a new piece of material.

  1.   I use the work cycle to present the exercise
  2. At the start of the lesson, we first place the solids horizontally from left to right on the top of the mat.  I then re-introduce the names of the solids. As I go over each name, I point at the name labelled on the cards.  
  3.  I introduce the matching Geometric Solid cards and show the child how to match them to the solids.


  4. Once the child is successful with the first set of cards, I then invite her to sort the remaining picture cards underneath.  Everytimethe child places a card underneath a solid card,   I ask her/him why she/he does so, enticing her/him to think about the shape and its characteristics. Once child placed the tent under the rectangular prism and when asked why, he said: “well, it has a rectangle shape here and a triangle shape here. And I have slept in a tent before with my Mam and Dad, so I know”.  This comment spurred a flow of other comments from the children who eagerly shared their own experience.


Once the exercise is completed, I show the child how she could turn the cards around and check for herself if her work was correct. Each card is colour-coded for control of error. I then show her how to tidy up the picture cards first from left to right, row by row. Then we pick up the labelled geometric cards from left to right. We place all the cards back in their basket. We then pick up all the solids from left to right and place them all in their basket. Both baskets are then returned to the sensorial shelves.  


I have to admit, this is not a table top activity and I should have presented the exercise on the floor. There is always room for improvement!!! All in all though, I found this activity absolutely brilliant for several reasons:
  • During one of my many  presentations, many children gathered up around Millie ( 4 years old) and myself. I was surprised with the visual impact the cards created once they were all laid out with the Geometric Solids.  In fact, throughout the lesson, several children in the classroom came to see what the "new work" was and I heard more remark, "Oooh, what's that?  I want to do that!"  It was heartening to see a new interest develop in the Geometric Solids sparked by this set.
  • Children may make several observations about this work. This activity was brilliant to begin discussions.  First of all, the children realised quickly that certain shapes are much more likely to occur in nature (ellipsoids) while others are much more likely to occur in human made construction (pyramids). And the ones made by men are much harder to find than the others. It was wonderful to see the children speculate as to why that is, and brainstorm about other examples of each of these types of solids.
  •  The children’s range of vocabulary as we revised the names of all the solids and compared them to their day-to-day usage. For instance, people commonly refer to any structure that starts broadly and ends narrowly as a pyramid (a child’s tower of blocks, for example).
  • The children know to spot the differences between a square-based pyramid and a triangular pyramid. It got the children to look at the details of each shape more carefully by comparing and matching. So if you want to stimulates your children’s awareness of geometric shapes, this is the way to go!
  • The activity  introduces them to mathematical concepts (geometry)
  • And believe it or not, but the whole exercise indirectly introduces children to art appreciation as they learn about the specific characteristics of each solid.
Ok... as I am studying like mad at the moment for my Montessori Degree, I decided to link this activity to theory. So, you may want to quit the reading of this post right here as it is going to get a bit "boring" for some of you!!! But believe me, it is a great practising exercise for me. So just bear with me!!

"Teachers in general are continually looking for ways to guide students’ understanding of mathematical concepts. Contemporary research has demonstrated that pre-schoolers need opportunities to explore their world and experience mathematics. There are 3  fundamental mathematical concepts that form the building blocks of mathematical and scientific knowledge: matching, classification, order & seriation.  The development of these concepts allows the children to organize and categorize information so that when they start formal schooling, they begin to apply fundamental concepts by exploring ideas both in maths and science (Charlesworth and Lind, 1999). The constructivist paradigm based on Piaget’s (1955) theory of cognitive development has long provided a framework for  educational practices in which children gain concepts trough involvement with the environment and construct their knowledge as they explore their surroundings. This means using manipulative materials that enable children to engage in active learning. Using pictures of objects that can be found in the children’s everyday life gives them the right experience in assessing the different characteristics of the solids and help the children to place them in their environment.

Also, having a print rich, or literacy rich environment is an important aspect of a child’s literacy education. According to one study, exposure to written language helps children develop a number of things including: awareness of print, phonemic awareness, letter naming, listening comprehension and eventually word reading. (Gunn, Simmons, & Kameenui, 1995, 3). Marie Clay (Teale & Sulzby, 1986) was the first person to introduce the term emergent literacy to describe the behaviors used by young children with books and printed words, even though the children could not actually read and write in the conventional sense. Mary Clay suggests that literacy development begins way before children start formal instruction in elementary school (Teale & Sulzby, 1986). Children have been found to learn about written language as they actively engage with adults in reading and writing situations; as they explore print on their own; and as they observe others around them engaged in literacy activities (Teale & Sulzby, 1986). For example, when hearing me say the word “ellipsoid” a few times and pointing at the printed word at the same time, the children are not just memorizing the word, but actually learning that printed words carry a meaning. And this is why labelling is very important. In a Montessori environment,  we use lots of nomenclatures and 3 part-cards with words printed on the cards. Just like in this activity. Repetition will provide experience for the children and help them associate the printed word with its meaning or what it represents."

 I hope I make sense!

Monday, February 6, 2012

What's on your fingertips?

Last week, the children discovered a new sensorial material on our shelves: the Baric Tablets. I have hummed and hawed for quite a while before buying the set. I considered making my own set but to be quite honest, I have so much on my plate at the moment but my 2 trainings... I got lazy and went for the easiest option.. Praying I wouldn't regret my investment. Once again, I shouldn't have doubted Montessori. What worked for her years ago still apply to the 21st century kid (to some extent, of course!)


For this activity, we use three boxes containing three sets of wooden tablets made from different types of timber (beech, oak, mahogany). There is a difference of approximately 6 grams between each tablets. And don't forget the blindfold (kids LOVE it. I think it makes the exercise more exiting!). The Baric Tablets are to stimulate the child's awareness in differences in weight and refine his senses. The idea is that the child closes his eyes to focus his attention on the weight rather than the color of the wooden tablets. When he opens his eye, the child can check whether or not he has sorted the tablets correctly by weight by looking at the different colors of these three types of timber.


When I put the tablets on the shelves, as you can imagine, children were queueing to see what the new exercise was. They all wanted to have a go at it first and it took a while before the children agreed to take turns and to let Tom go first. I stepped back and let them solve the problem themselves. I was so proud of them for sorting it out all on their own without my intervention! I followed our usual  Montessori work cycle and  picked the 2 most contrasting tablets (the lightest and the heaviest). I closed the box and placed it on the top right corner of the table,his hands up and his fingers bent and spread. I placed one tablet on each hand and asked Tom which one was the lightest and which one was the heaviest. I showed him how to make a tower with the heaviest tablets and another with the lightest. 

(Again, my pics are turning sideways!! Thought they are the right way in my picture folder on my computer!! Anybody there who knows how to rotate pics when writing a post?)
Once Tom has mastered one type of contrasting tablets (lighter/heavier), he can move to another set (Lighter/medium or heavier/medium). Finally, as the children progress, they can use the 3 sets together and pile the tablets into 3 towers as they categorize them into light, medium and heavy.


Needless to say that the exercise was very popular!! Children love diversity and this material concentrates on one sense they had never been aske to work with. It is different and it is challenging.  So, investing in the Baric tablets was definitely a good move for our classroom. No regret here!!
At home, you can easily recreate this activity by using any objects you can find which will introduce the concept of heavy and light to your child : wooden blocks, rocks, feathers, marbles, etc..  Of course,  a homemade lesson might not appear as controlled as using the Montessori tablets, but you would still achieve your goal: teaching weight discrimination and refining your child's awareness of weights in his environment.

If you know of any extension to this activity, please leave a comment. See you soon!


Sunday, February 5, 2012

Language activities in our classroom

A few months ago, I wrote about all the Montessori pre-language activities we have in our classroom in this post right here. As children progress, I then introduce them to more "traditional" Montessori-type language materials. When do I know when they are ready? Well, if they show interest in letters, in writing and in sounds, then I consider they are ready! And I start by introducing them to the sandpaper letters.


As I discussed in here,  we tend to introduce letters by phonetic sounds rather than by their names. We do not follow the alphabetical order.

We don't have a special set up in our classroom for literacy activities. As part of the Montessori work cycle, I let the children choose the spot of their choice for their work. To be honest, the children have realised (unconsciously) that it is handy to be placed near the language shelf, just in case they have forgotten to bring something with them to the table. Below, you can see our sandpaper letters, our phonic booklets (I will talk about it later on in this post) and my blue container where I store the children's letter and number booklets. These booklets help me to keep record of their progress as they learn sounds with their sandpaper letters (see the post on this record keeping system right here). We also have a "sand" tray for tracing each letter, usually placed on the right hand side of the sandpaper letters on the shelf. A child was using the tray when I took the pictures, so I added a seperate photo below. As you will notice, we are actually not using sand but salt (I find it less gritty and it tends to mark my table a little bit less!!).  
the top shelf of our language shelving unit


When doing a presentation with a child, I station myself  at the table with the child.  To present a sandpaper letter and its sound, we use the three-period lesson: period 1 (This is letter /a/), period 2 (Show me /a/) and period 3 (what's this sound?). As I trace the letter in its writing direction, I also say the sound of the letter, looking straight at the child. Then I invite the child to trace the letter with his index and middle finger. The child will spontaneoulsy give the sound of the letter, though he doesn't have to.

I recently made some little books for the children to practice their sounds. I printed pictures of words with the initial sounds in question. I cut them out, and made little cards that I then laminated. And finally, I bound them together and voila!! Basically, there is just a picture (or 2) on each page. The picture begins with the corresponding letter sound.  When we read it, we emphasize the beginning sound (i.e.  /mmmmm/ mop). On the front cover of each booklet, you can see the corresponding letter. I have tried to reproduce the effect of the sandpaper letters by gluing some couscous seeds all over the letter.


(I am sorry.. for some reason, the above photos wouldn't come out the right way!!)
Once the children have been introduced to a letter, they can refer to the above booklet. For example, if they are learning about /c/, they pick the C booklet, point at each picture on the page, saying the word loud to hear its initial sound. I found it to help the children retain the sound of the letter much easier. The more practice and the more examples you give them, the better. This also can be regarded as a pre-reading exercise as it requires the children to read from left to right. I also ask them to plac their index underneath each photo to prepare them to reading.

When we have finished a full set of 4 letters (for example /a/, /c/, /m/ and /t/), I also like the children to practice further before introducing new letters from a diffrent set. So, following the Montessorian method, I created 2 other exercises.

First, I bought a plastic enveloppe and write the letters of a set on the front. I printed and laminated various pictures of words starting with corresponding sounds and placed them in the enveloppe. The children pick the 4 sandpaper letters they have studied as a set and placed them on the top of the table or the mat. They then take the pictures out, place them in a neatly stack in front of them and picking the 1st card on top. They say the word loud. They then have to place the card under the letter which represent the initial sound of the word.


For the second exercise, we proceed the same way but instead of pictures, we use objects. I keep the objects in a box labelled with the letters of the set in question.


It is important to note that at that stage children do not need to know the name of the letters. They just need to know their phonic sound. Most of them will actually have assimilated both name and sound, but this is not  requirement.

I know.. I said at the beginning of this post that I would talk about more "traditional" Montessori language materials. These activities are not "technically" Montessorian but they are based on the same principles. We are talking about the pink language series (pink object box and  pink picture box with the moveable alphabet, the pink picture and object box with reading cards etc...), the blue and green series etc...
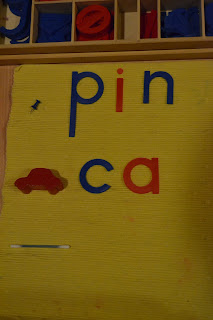

Pink Object bo and Large Moveable Alphabet


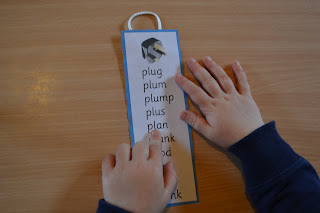
Blue word list


Yet, the booklet and the 2 exercises I have set up are very much adapted to the needs in our classroom. A few children will swiftly move to the "traditional" language activities before the end of the year, though the local primary school teachers have asked us, local Montessori preschool teachers,  not to introduce the children to any letter and sound before their entrance in the primary school system. Why? I am not really sure. I think they fear the children will be given the wrong tools to familiarise themselves to phonics and letters.

However, I went to my son's parent/teacher last Monday and I have to say I was secretly delighted to see what I saw. Stefan is 5 and  started primary school last September. You'll be glad to hear that he is a model student (did she have the right child???). No, seriously, what struck me was her quick presentation of their pre-reading learnings.  She explained to me how they have started blending sounds to make words with the children in her class, after having learned the phonetic sound of each letter. I refrained myself from telling us that this was exactly how Montessorian teacher present pre-literacy exercises to the children to prepare them for reading and writing. I was not ready for a debate and neither did I have the time. But this proved to me that, once again, the Montessori method of education follows the individual needs of the child and his longing for hand-on learning experiences. Montessori has been copied by many educative systems throughout the years and I am proud to be one of its fervent followers. Did you actually know that in the 1980's, in France, the department of education had banned the name of Montessori from its textbooks? My mother who was at the time working as primary school teacher with children from 2 to 5 years old has told me that Montessori was a name not to be pronounced!! Why? She can't remember. What she didn't realise is that the French national curriculum for that age group was actually an adapted copy of every idea and method developed by Montessori!! Two examples: the silence game and the walking on the line. Inspectors had advised her to introduce these activities in her classroom... She only found out that these were actual Montessorian activities when I finished my first training and started reading all the notes she took over her 27 year career. She couldn't believe it!!! Neither did I!!!