Wednesday, November 14, 2012

Who said the Montessori method had to be rigid??

We use the Brown Stairs and the Pink Tower in our classroom (please click on the links if you are not familiar with the Montessori method of education).  They are fundamental pieces of equipment in our sensorial area. Some Montessorian teachers are very strict with the way the children use these types of material. And I do appreciate why. However, I do not believe in being too rigid and I always leave room for imagination and constructivism in my classroom. So this week, the children did find another way to build the Brown Stairs and the Pink Tower and use them as a stepping stone to pretend play!! Cool...


Using the Brown Stairs with plastic animals..


Using our Pink Tower with little toy cars...

Developmental fine motor skills

This week, I added a new type of activity to our literacy shelves, for the children to practice their handwriting. Some of them still find it very hard to hold their pencil properly and to keep a steady hand when tracing or colouring. So I printed  a collection of activity pages/sheets that can be used for pre-writing practice. I laminated them all and bound them together. The children can now use them with a dry erase pen and use a brush to clean each sheet as they have completed the exercise.    Needless to say that the brush has added a great point of interest to the activity!!


Some preschool teachers will find these useful, and some will not. Montessori advocated the use of the salt/sand box to teach the child how to write. I think that variety is a key element in a classroom and the children really like this new activity. The eye-hand co-ordination required for writing/tracing is a very important developmental physical skill and I have found that requiring a child to trace lines and draw from dot to dots when they are not ready is the fastest road to fight with boredom and frustration. Children who are ready for this work, however, can enjoy a great deal of satisfaction and a sense of order when completing the pages too!! So it works for everybody!

Cute little owls

We are now finishing our study on hibernation and I had planned to make a little hedgehog to conclude our study. Yet, at circle time, as we were going over the names of the animals that go to sleep in winter, one little boy mentioned owls. I reminded him that owls do not hibernate. "I know that", he said. " But they keep an eye on all the animals that are asleep!! That's why owls don't sleep at night! They make sure the others are ok!". I thought it was so sweet. I made sure to use this opportunity  and introduced the term of "nocturnal". I took the example of our story "The Kissing Hand" at the beginning of the year when little Chester the Racoon was going to school at night time. Kids started toalking about hmasters and gerbils (some of them have some at home and knew that these little creatures only come to life really at night time!). It was a great teaching moment and it got the children talking a lot about their own exeriences and about what they knew.  Even though we use themes in our classroom to manoeuvre along our Montessori curriculum, I like the Reggio Emilia approach which leaves a lot of room for improvisation and constructivism. I really like the idea of project approach: sometimes a project is based on what I’ve observed the children doing, sometimes it’s based on things I hear the children talking about or questions they ask (just like happened today). This is why I thought of a little craft for them to do and this is what we ended up with:
 
I got some fabric I had saved up and cut it up into little squares. I made templates of owls using cereal boxes. The children spread the PVA glue onto the template and covered it up with the fabric.


Then the children added the eyes and beaks made out of felt and finally they glued on buttons to make the eyes look bigger!

 
So cute!!!

Tuesday, November 6, 2012

Another pre-reading activity

Here is a little activity we have done these past 2 days. Some children can already recognise their names on their name tags without even referring to the picture attached to it. Some need a bit more practice. This exercise proved to be perfect: the children had to glue the chick peas or split red lentils onto the traced letters of their names. They really had to concentrate hard! Great way to develop their visual memory! (I am sorry if all the photos are crooked! I don't know how to fix this problem. The pictures are perfect in my folder on the computer but for some reason, they come up the wrong way sometimes when I use them on my blog!!)


Making progress in writing

The children have started learning to recognise their names since the beginning of the year. We use a very simple method: their name tags on top of their coat hangers ...


....  and the ones they use on our roll call board.


They also do work in their work copies and when asked to do so, they have to retrieve their copy, recognising their names written on the front cover (sorry,I don't have any picture).
 
The next step is to help them write their names down, which can be very tricky for some. But this is what preschool is all about!! Learning, practising, trying ... I wrote a post right here in the past, explaining how we proceed. Some of the children have very poor penmanship and we let them practise their skills using worksheets, joining dots at first. 


I also find that tracing over words does help them a lot too. In the photo below, you can see a child tracing over words related to Autumn time. Though he cannot read yet, he is able to associate the written symbols to a meaning, thanks to the picture placed beside the written word. 


Once the children are much more confident at holding their pen and tracing carefully, we move on to the tracing of their names and finally, we completely get rid of the dots. Read the post I mentioned above and you will fully understand what I am talking about.
 
This year, I have added another step: I have created little booklets for the children to help them practise the letters in their names. (I cut a work copy into 2 to make the little booklets).


Let's take JESSICA for instance. 


Jessica will have to start tracing the letter J, using dots ; then she will reproduce the letter all on her own.


The procedure will be repeated for each letter of her name until she is ready to reproduce them all together independently.


The booklet is actually a great way to record how the children are progressing and how much they have achieved so far. The booklet will also be a nice little keepsake at the end of the year.

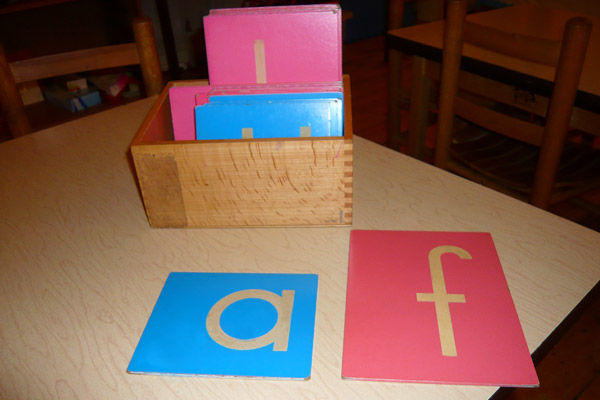
Of course, everytime we introduce a letter to the child, we will use  the sand paper letters and the salt/sand box to teach him the right way to trace the letter.
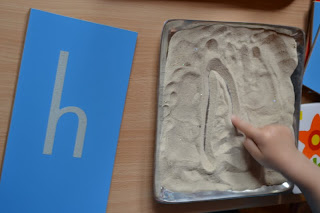


In a Montessori classroom, the sand/salt box is always used as a stepping stone to many other writing and reading activities. In our preschool, we also use a dry erase board in conjunction with the salt box. It is a very effective way to practise and the children like the idea of using the brush to clean the board. Some people use chalk boards. I personally think that chalk is a bit too messy in a classroom and this is why we use dry erase boards instead.

So, over the weeks to come, this is what we wil be all at in our classroom. And by next June, all the children moving to Primary School should be able to write their names all on their own!!I will of course present the children with several other types of activity to diversify and vary the learning process and make it more interesting. So keep in touch!